These trendy bracelets are fairly simple to make and really fun!
If you are an absolute beginner, try making a shorter version first so you get an idea for how it’s done.
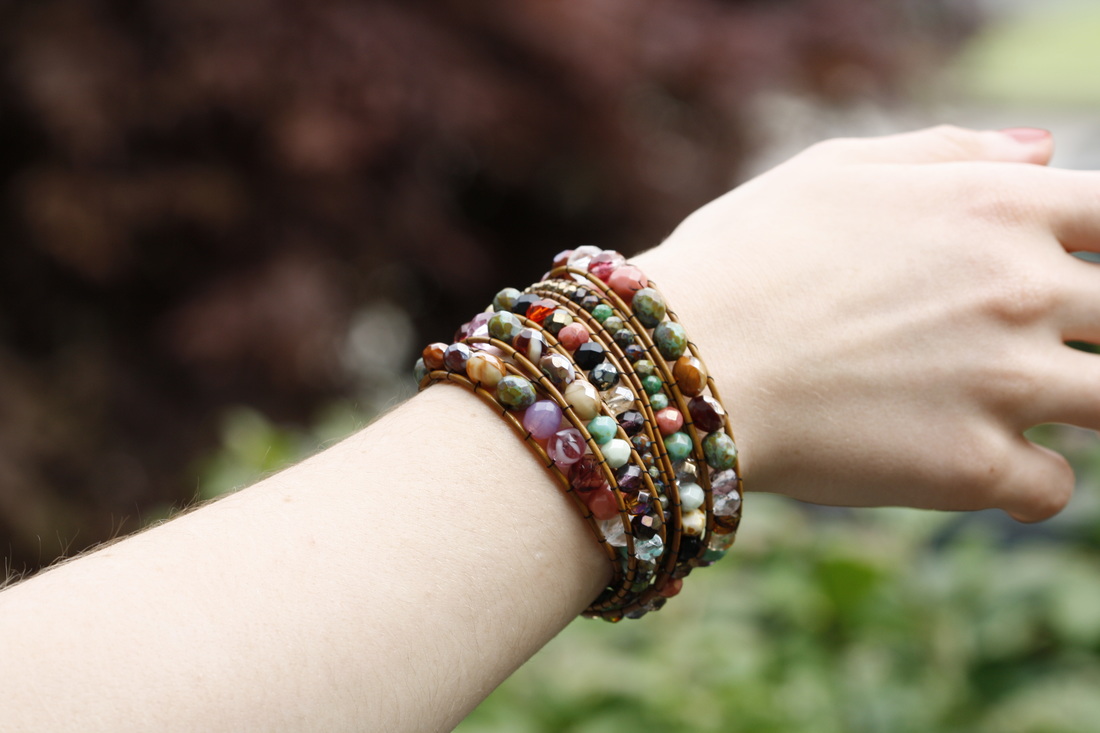
The best beads to use are Czech Firepolish Rounds. You can use all one size or different sizes for a graduated look like in this bracelet. I also used Gemstone Doughnuts because I like the added variety.
Use any colors you like, for color palette inspiration, check out our color pages. I chose to use light brown leather cord, contrasting black thread (remember, your thread will be visible so choose the color wisely), and a variety of bead colors that had a natural, semi-precious look to them.
Supplies:
Leather Cord 1.5mm thickness about 76 inches for a bracelet that wraps around five times a 7inch wrist. You will need to alter this length based on your own wrist size. Measure the cord around your wrist however many times you want it to wrap (more than five starts getting very unwieldy and I wouldn’t recommend it) and then double that length. Leave some extra cord just in case.
Pewter button
Thread: This length of bracelet will require you to add more thread as you go along. When you have less than 8 inches of thread left, add more thread.
Beading needle
Scissors
A clipboard
Beads: You can use almost any beads for this bracelet and the amount will vary depending on the length of your bracelet and your design. In this bracelet, I used:
27 9x6mm Gemstone Doughnuts in Green Turquoise Picasso and Earthy Multi Celsian
15 8mm Firepolish Rounds in Pink Mix
66 6mm Firepolish Rounds in Happy Mix
48 4mm Firepolish Rounds in Green Brown Mix Picasso
16 3mm Firepolish Rounds in Bronze
3mm Bronze Firepolish Round Beads
Steps:
Once you have your cord cut to the right length, thread the pewter button onto your cord all the way to the middle (bring the two ends of the cord together to find the perfect middle).
Clamp the button with the clipboard.
Thread your needle and secure the thread to your cord with a square knot, close to your button. Weave around the cord several times to secure the thread.
Pick up the first bead you are using (I started with the 4mm beads) and thread through it from the top, making sure your thread is underneath the top cord but above the bottom cord. Then thread through the same bead from the bottom, this time with your thread on beneath the bottom cord and coming out above the top cord. You are making a figure 8 with your thread.
Pick up the next bead and repeat. You will continue doing the same thing with all your beads until your bracelet is finished. Click on the photos below for a bigger image.
Now adding a 6mm bead.
Now adding an 8mm bead.
Your bracelet is starting to come together.
Now adding the Gemstone Doughnuts.
You’ve reached the end of your bracelet. When you have reached the appropriate length, secure the last bead with a knot and several rounds of threading.
Tie a simple overhand knot with both strands of cord close to the last bead.
Make a second overhand knot after the first that’s slightly larger than the diameter of the button. Check the fit before pulling it tight.
Trim any excess cord and your bracelet is ready to wear!
Perfect for any summer outing! Enjoy!
SHARE THIS:
 RSS Feed
